Why would I use HuskiMail on my website? #
If you have HuskiMail you can use it to send mail as your website instead of relying on the webserver. This means that people will far more likely receive your order notifications and more… instead of them going to their spam or junk folder. HuskiMail is designed for deliverability in mind.
HuskiMail is a paid business email product offered separate from your hosting plan. HuskiMail is not required to send mail for your website, but is available to use if you desire. If you do not have a HuskiMail account, SMTP methods in this article will not work and will return an authentication error.
How do I set up HuskiMail on my website? #
You’ll need a SMTP plugin. For this tutorial, we’ll use “WP Mail SMTP”. You can use whatever SMTP plugin you like, though!
Step 1: Install and activate the WP Mail SMTP plugin. #
You’ll need to go to your plugins, then click Add New then search for “SMTP” in the plugin search box. Once you see the plugin click the Install button. Then click it again when it turns blue and says “Activate”.
Step 2: Setup the SMTP options #
Once your plugin is active, you should see a screen like this:
Click the “Let’s Get Started” button.
Then select the “Other SMTP” button at the bottom.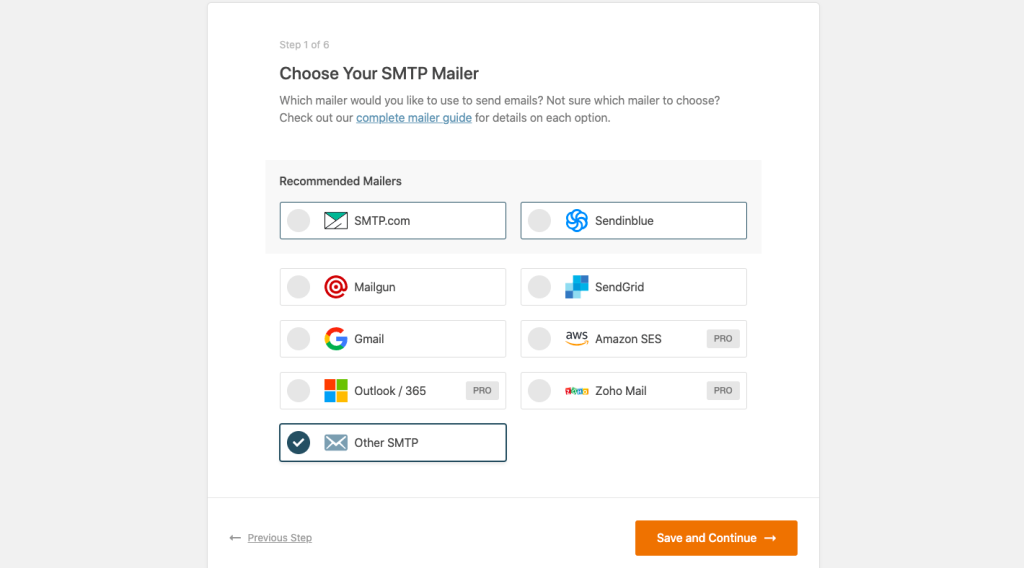
Then click Save and Continue.
Step 3: Add the SMTP credentials. #
You can use the login information for the email address you created in HuskiMail.
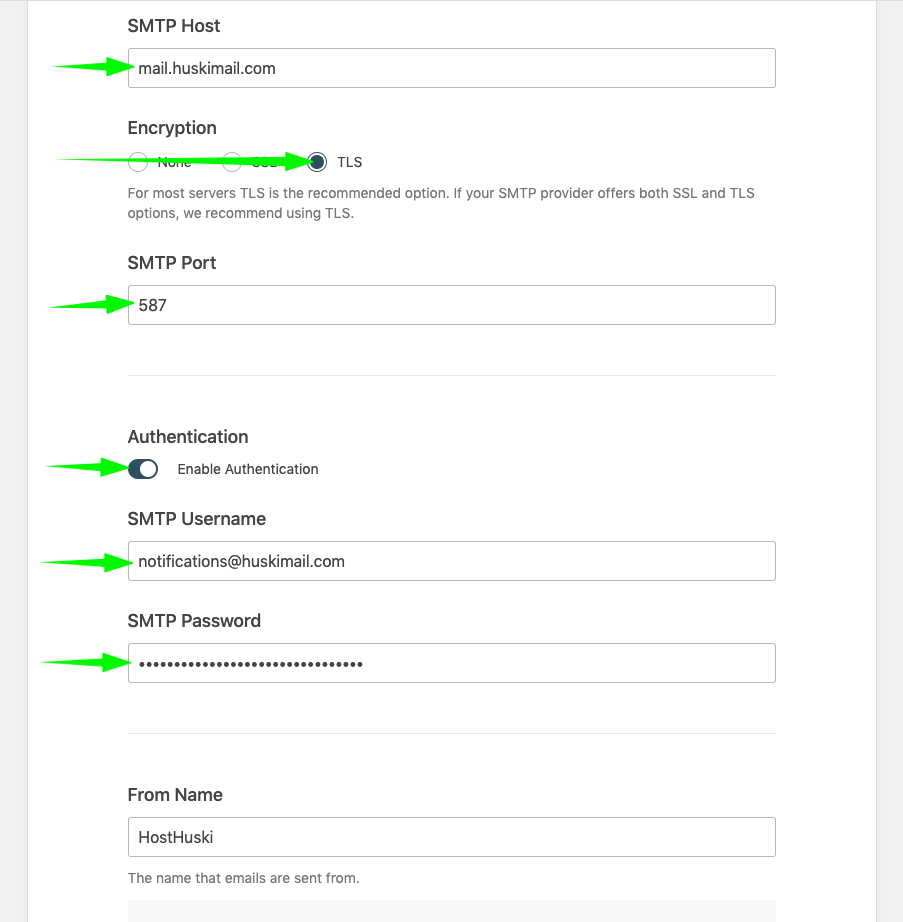
You can fill the fields in the setup form as follows… #
SMTP Host: safari.mxrouting.net
Encryption: TLS (use this option, only.)
SMTP Port: 587 (the form should autofill this value for you)
Enable Authentication: Set to ON
SMTP Username: Your full email (or the email address you created for notifications) including the domain (example: notifications@huskimail.com)
SMTP Password: The password for the previously entered email
From Name: Whatever you want customers to see when they get an email from you.
*Activate the “Force From Name” option below this field.
From Email: Should ideally match the SMTP username.
*Activate the “Force From Email” option below this field.
Then, you click the “Save and Continue” button.
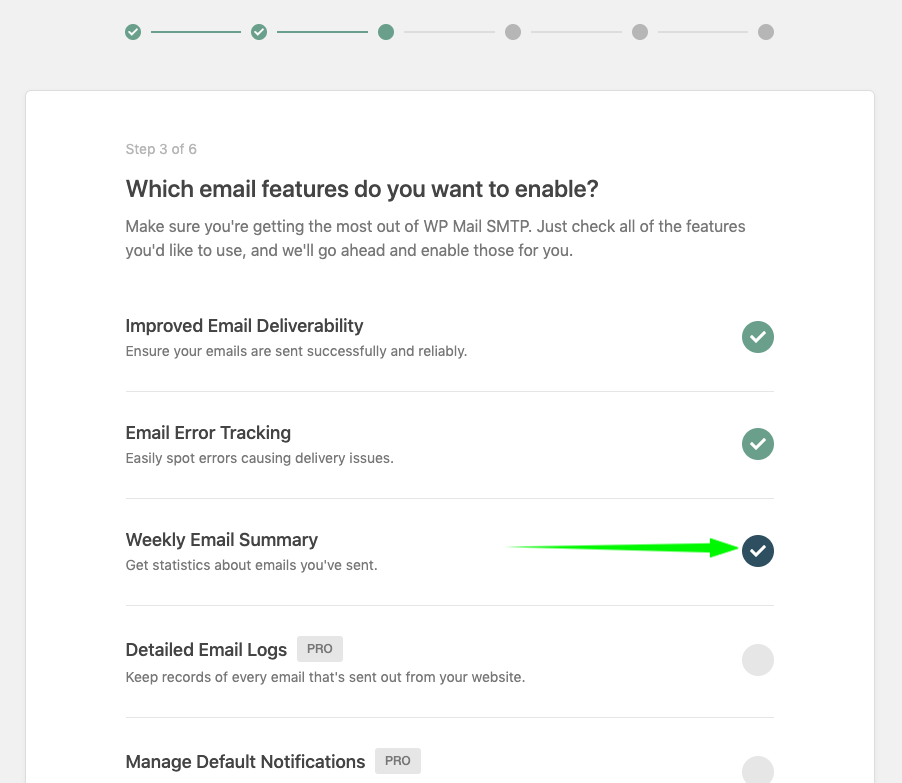
The next screen will say “Which email features do you want to enable?” And you can only select or unselect the “Weekly Email Summary” option. If you want a summary email of emails your site has sent keep this option selected. If not, deselect it.
Finally, click “Skip this Step” on both the remaining screens until you see a button that says “Finish Setup.”

Done! #
That’s it! Now your site will use HuskiMail to send delivery-optimized mail for your website via SMTP.


