
Overview #
Huski Events sends buyers to Stripe Checkout to pay. You need Stripe API keys and a webhook so payments are confirmed.
Where to Find It #
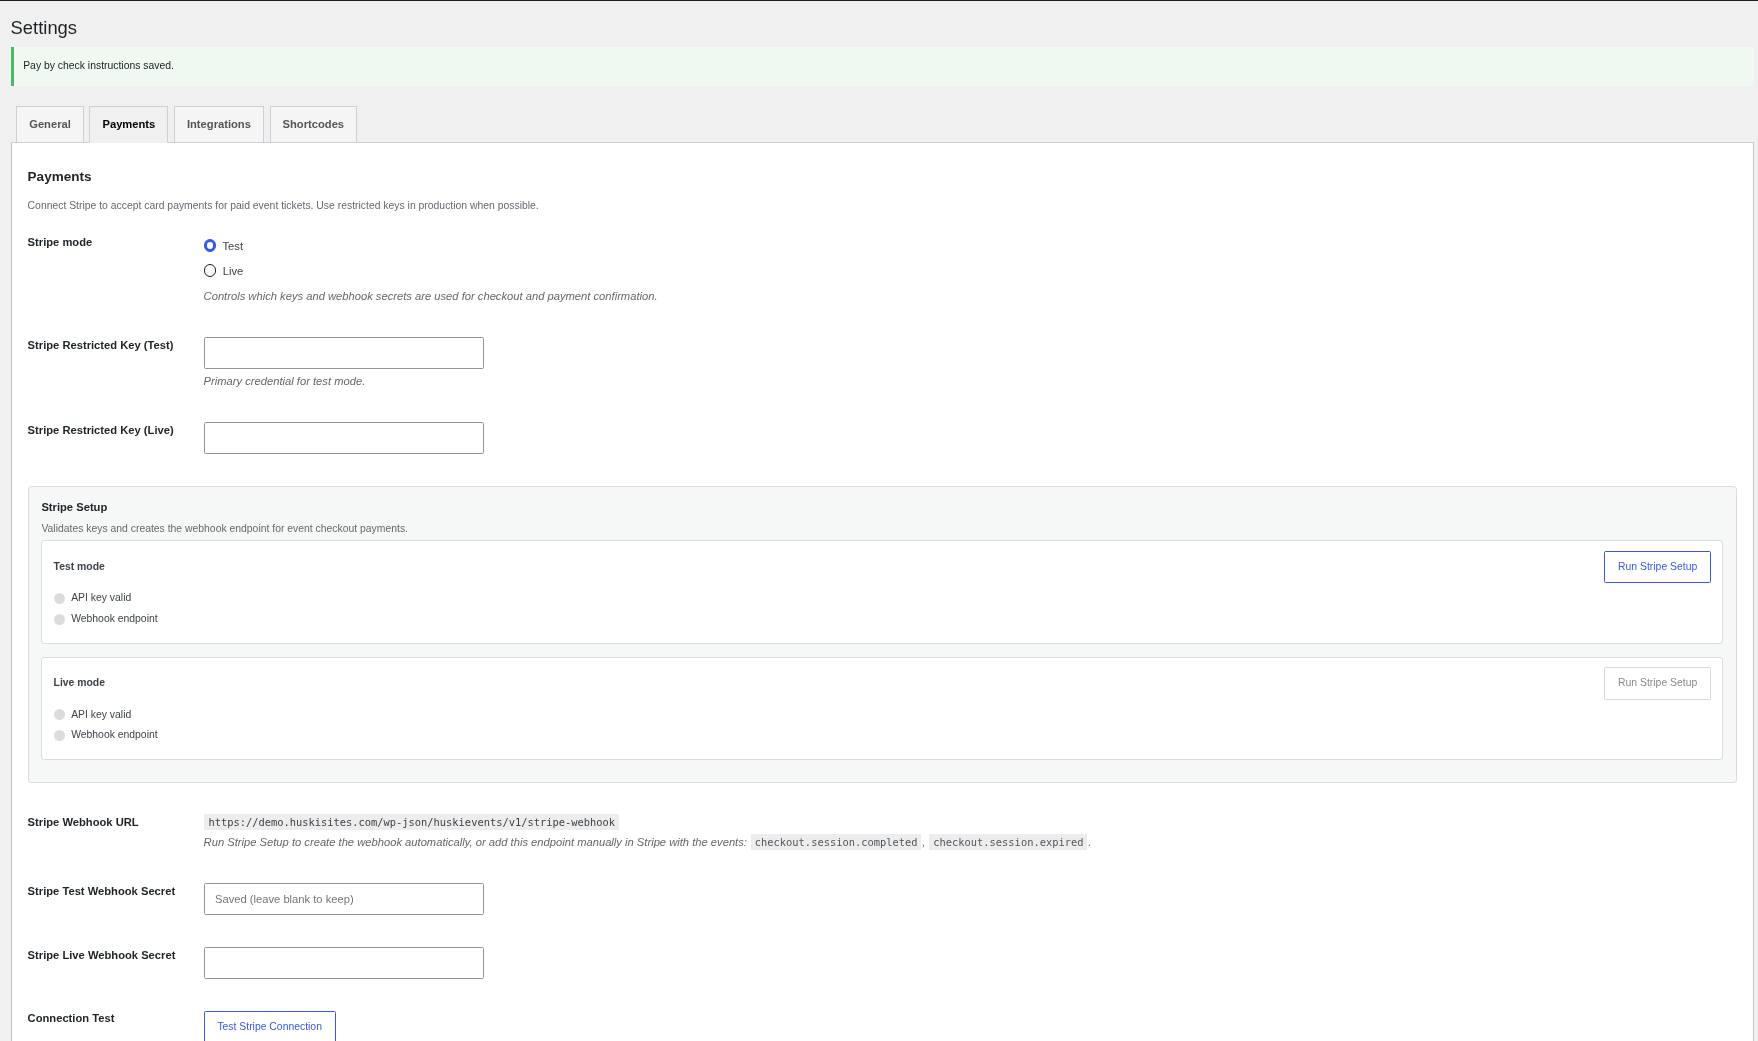
Go to Huski Events > Settings, Payments tab (/wp-admin/edit.php?post_type=huskievent&page=huskievents-stripe).
How to Connect #
- Choose Test.
- Create a restricted key in Stripe with write access to Checkout Sessions and Webhook Endpoints, and paste it.
- Click Run Stripe Setup. It checks the key and creates the webhook for you.
- Paste the webhook signing secret (starts with whsec_) and click Save Payment Settings.
- Click Test Stripe Connection, make a test purchase, then repeat for Live.
To add the webhook by hand, use the Stripe Webhook URL shown with the events checkout.session.completed and checkout.session.expired.
Best Practices #
- Use restricted keys in production.
Troubleshooting #
- “The provided key appears to be for live mode, not test mode.”: Paste the key for the selected mode.
- Payments stay pending: Check the webhook signing secret.
That’s it, dawg!


